Sewing Issey Miyake Pattern 2059
WE ARE SO BACK!!!! It’s fall (“fall”) (almost fall) and that means: swimsuit season over, I start sewing clothes for myself and touching wool. I bought more Issey Miyake patterns. I actually had someone reach out via my blog asking to copy 2 of my Issey patterns and as a result I searched for even more and found 2 nice ones. The one I made first is View A of Vogue 2059:
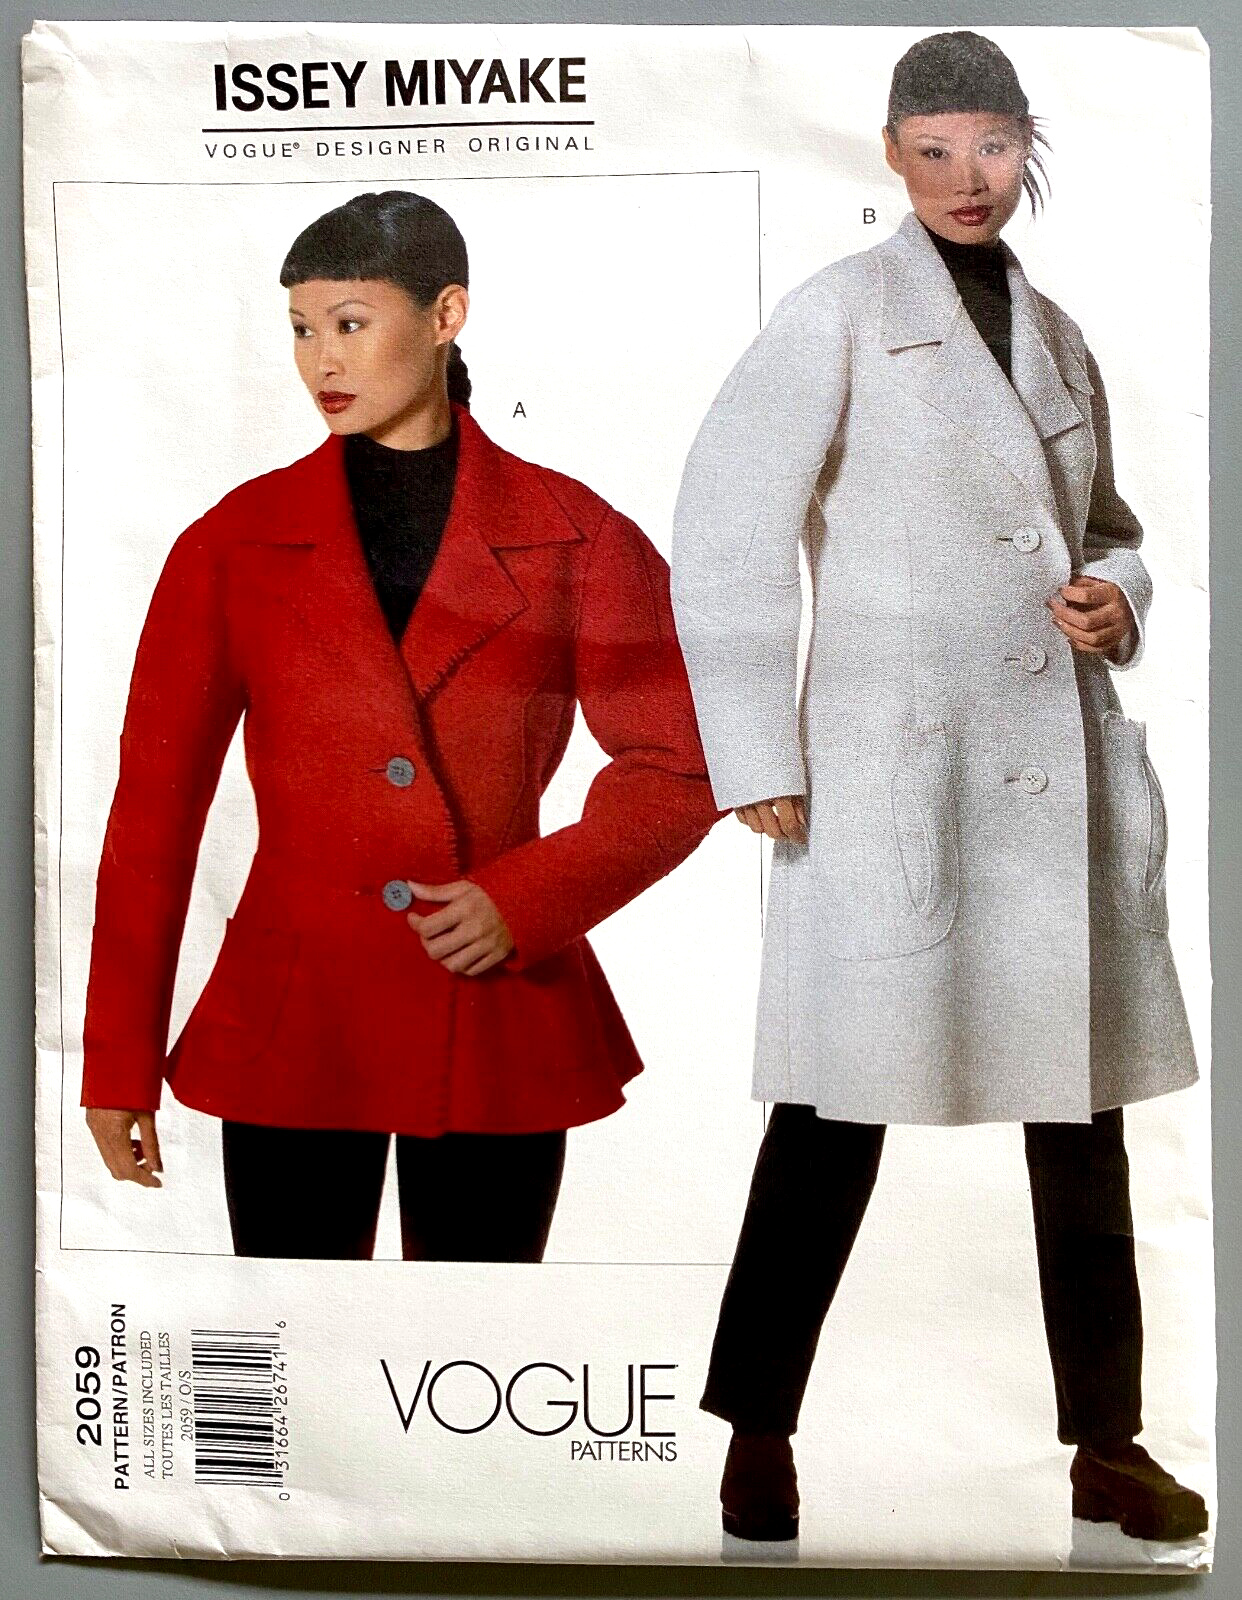
This 1997 pattern is described: “Very loose fitting, unlined jacket has collar, collar band, dropped shoulders, seam detail, insets, pockets, self fringe and long sleeves. A: below hip, shaped back forms bustle effect. B: mid-knee, side panels and no side seams.”
Which is pretty short for a Miyake pattern description but that about covers it. I definitely wanted to make view A because I love the “bustle effect” described; the back of the envelope has a side view photograph of the model demonstrating it:

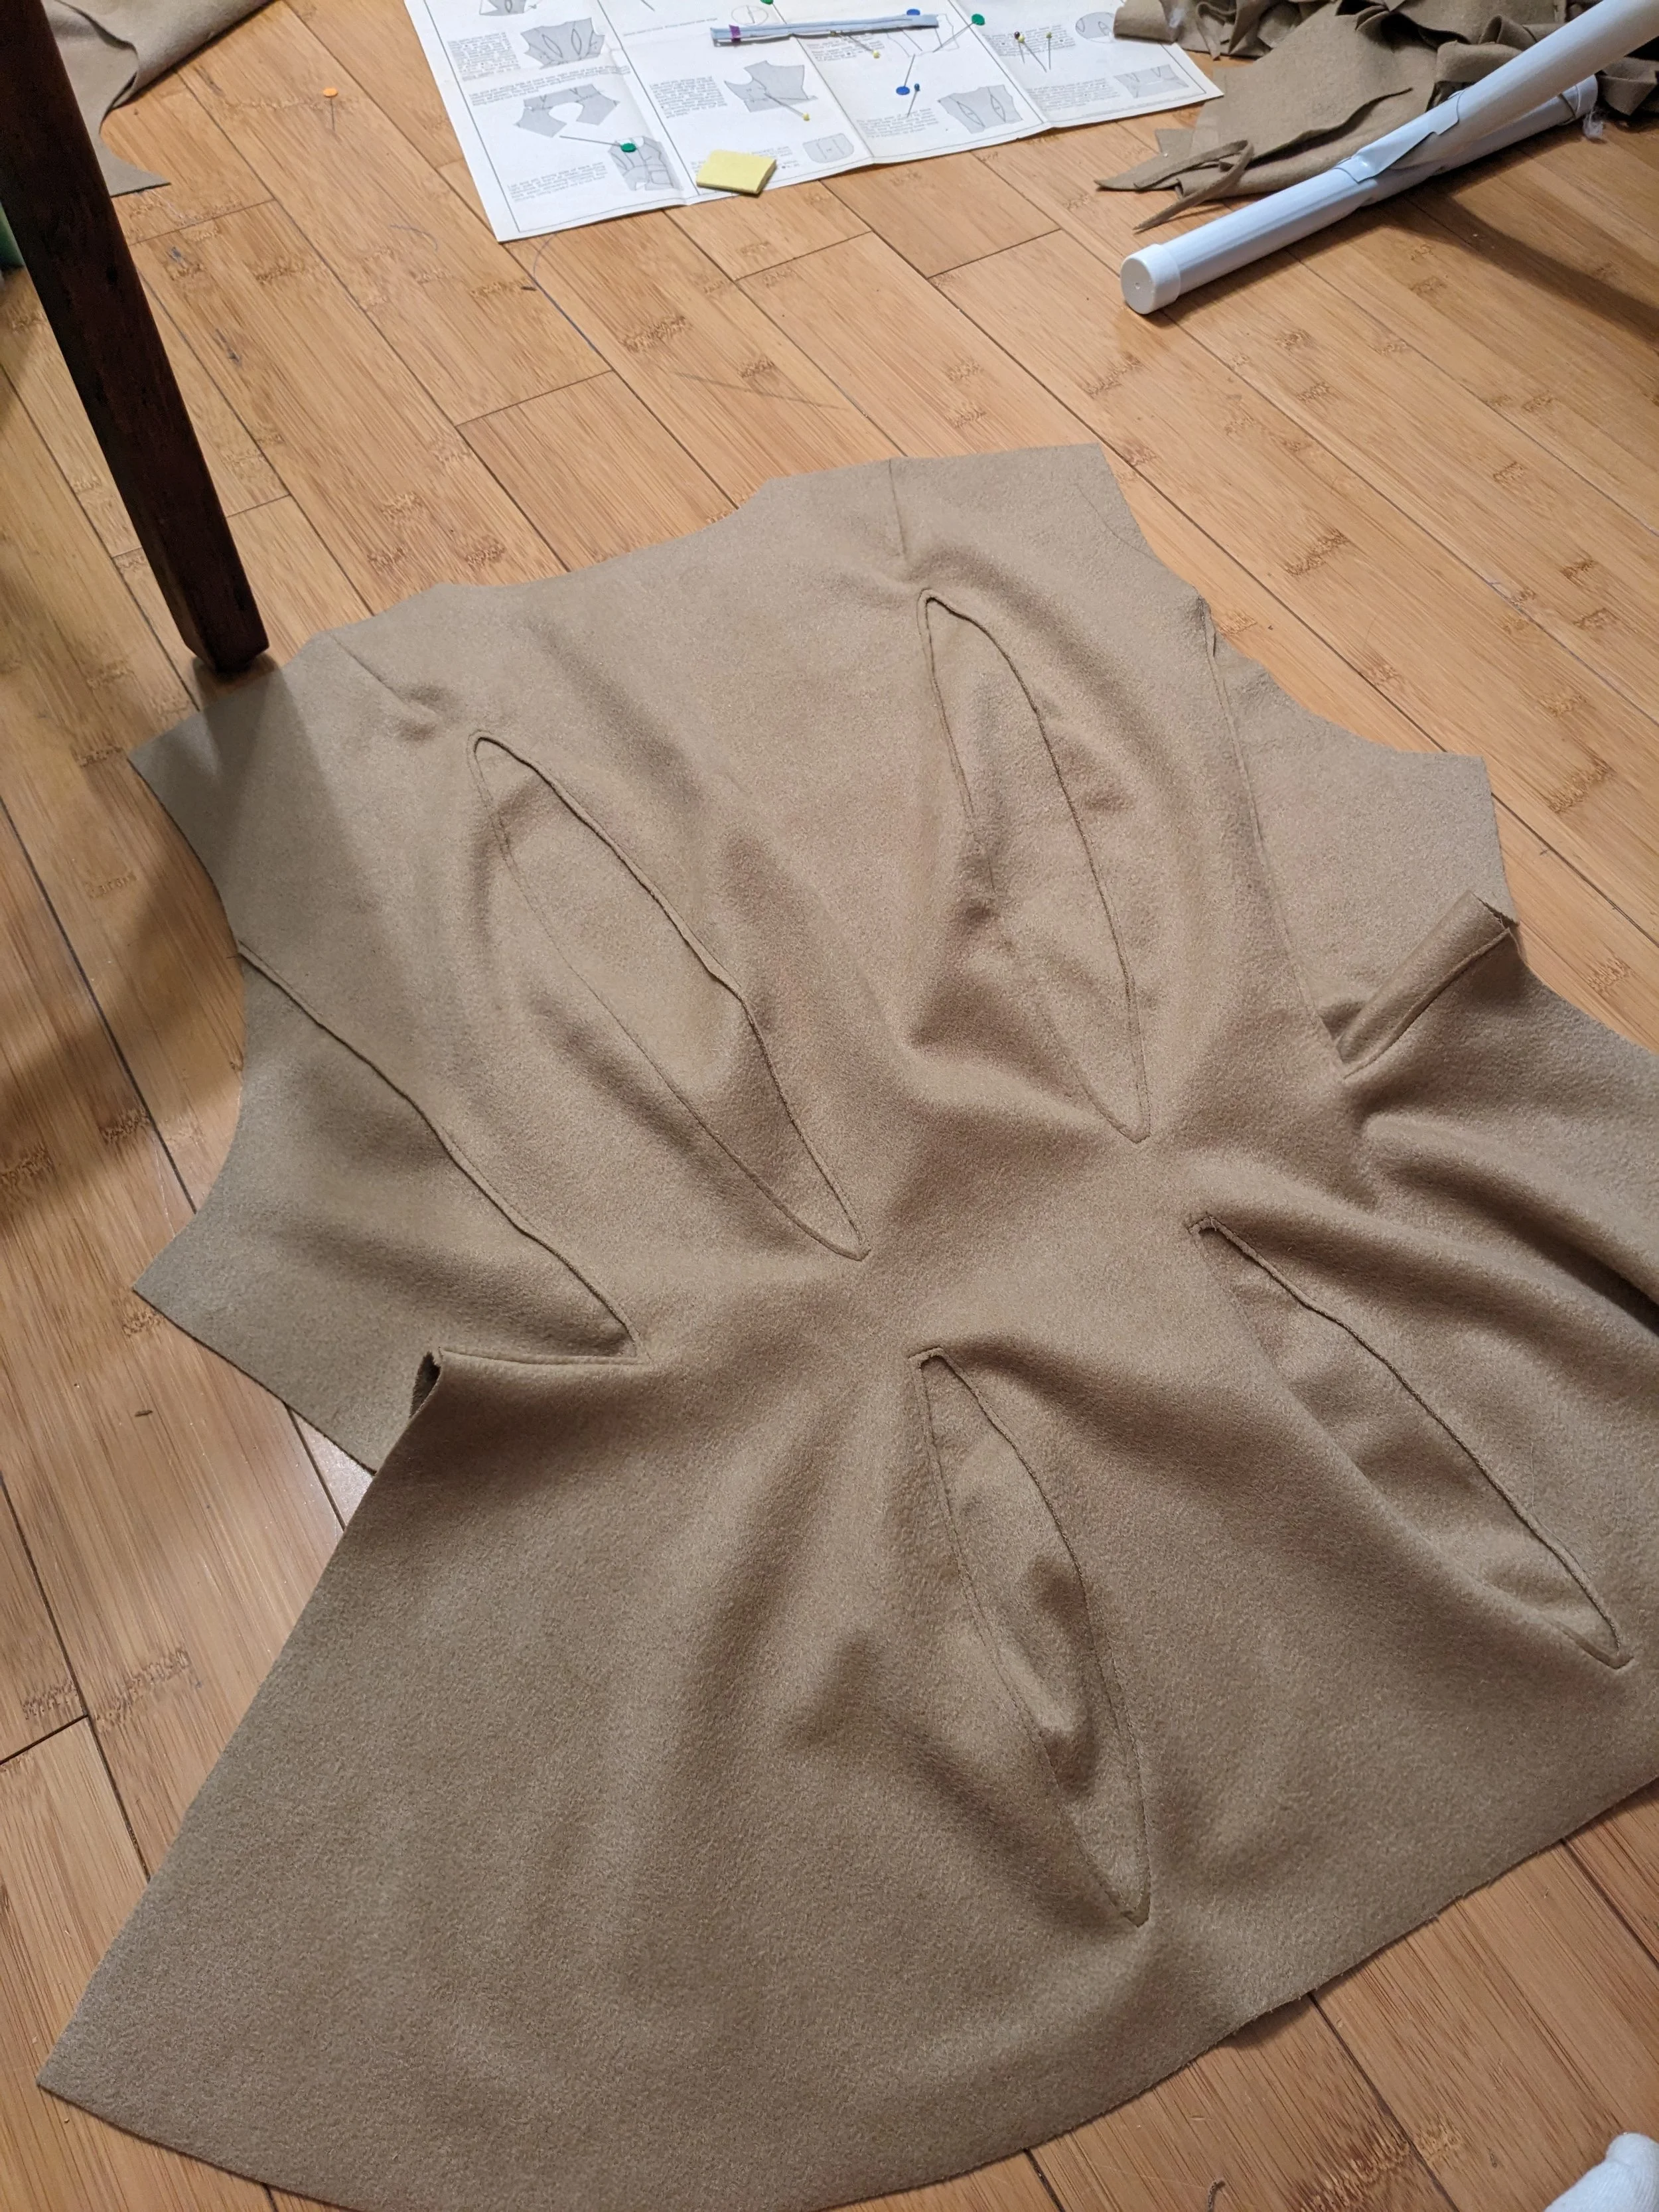
I used a very soft warm toned beige wool with a little bit of a nap to it.. I liked the idea of all the insets having just a bit of texture to show the nap along the grain line. The wool came from my grandmother’s fabric collection that my mom gave me when she passed away. So that was special to me. As will become clear it is very important to not use a fabric that frays - this jacket is unlined and all raw seamed and layered piecing.
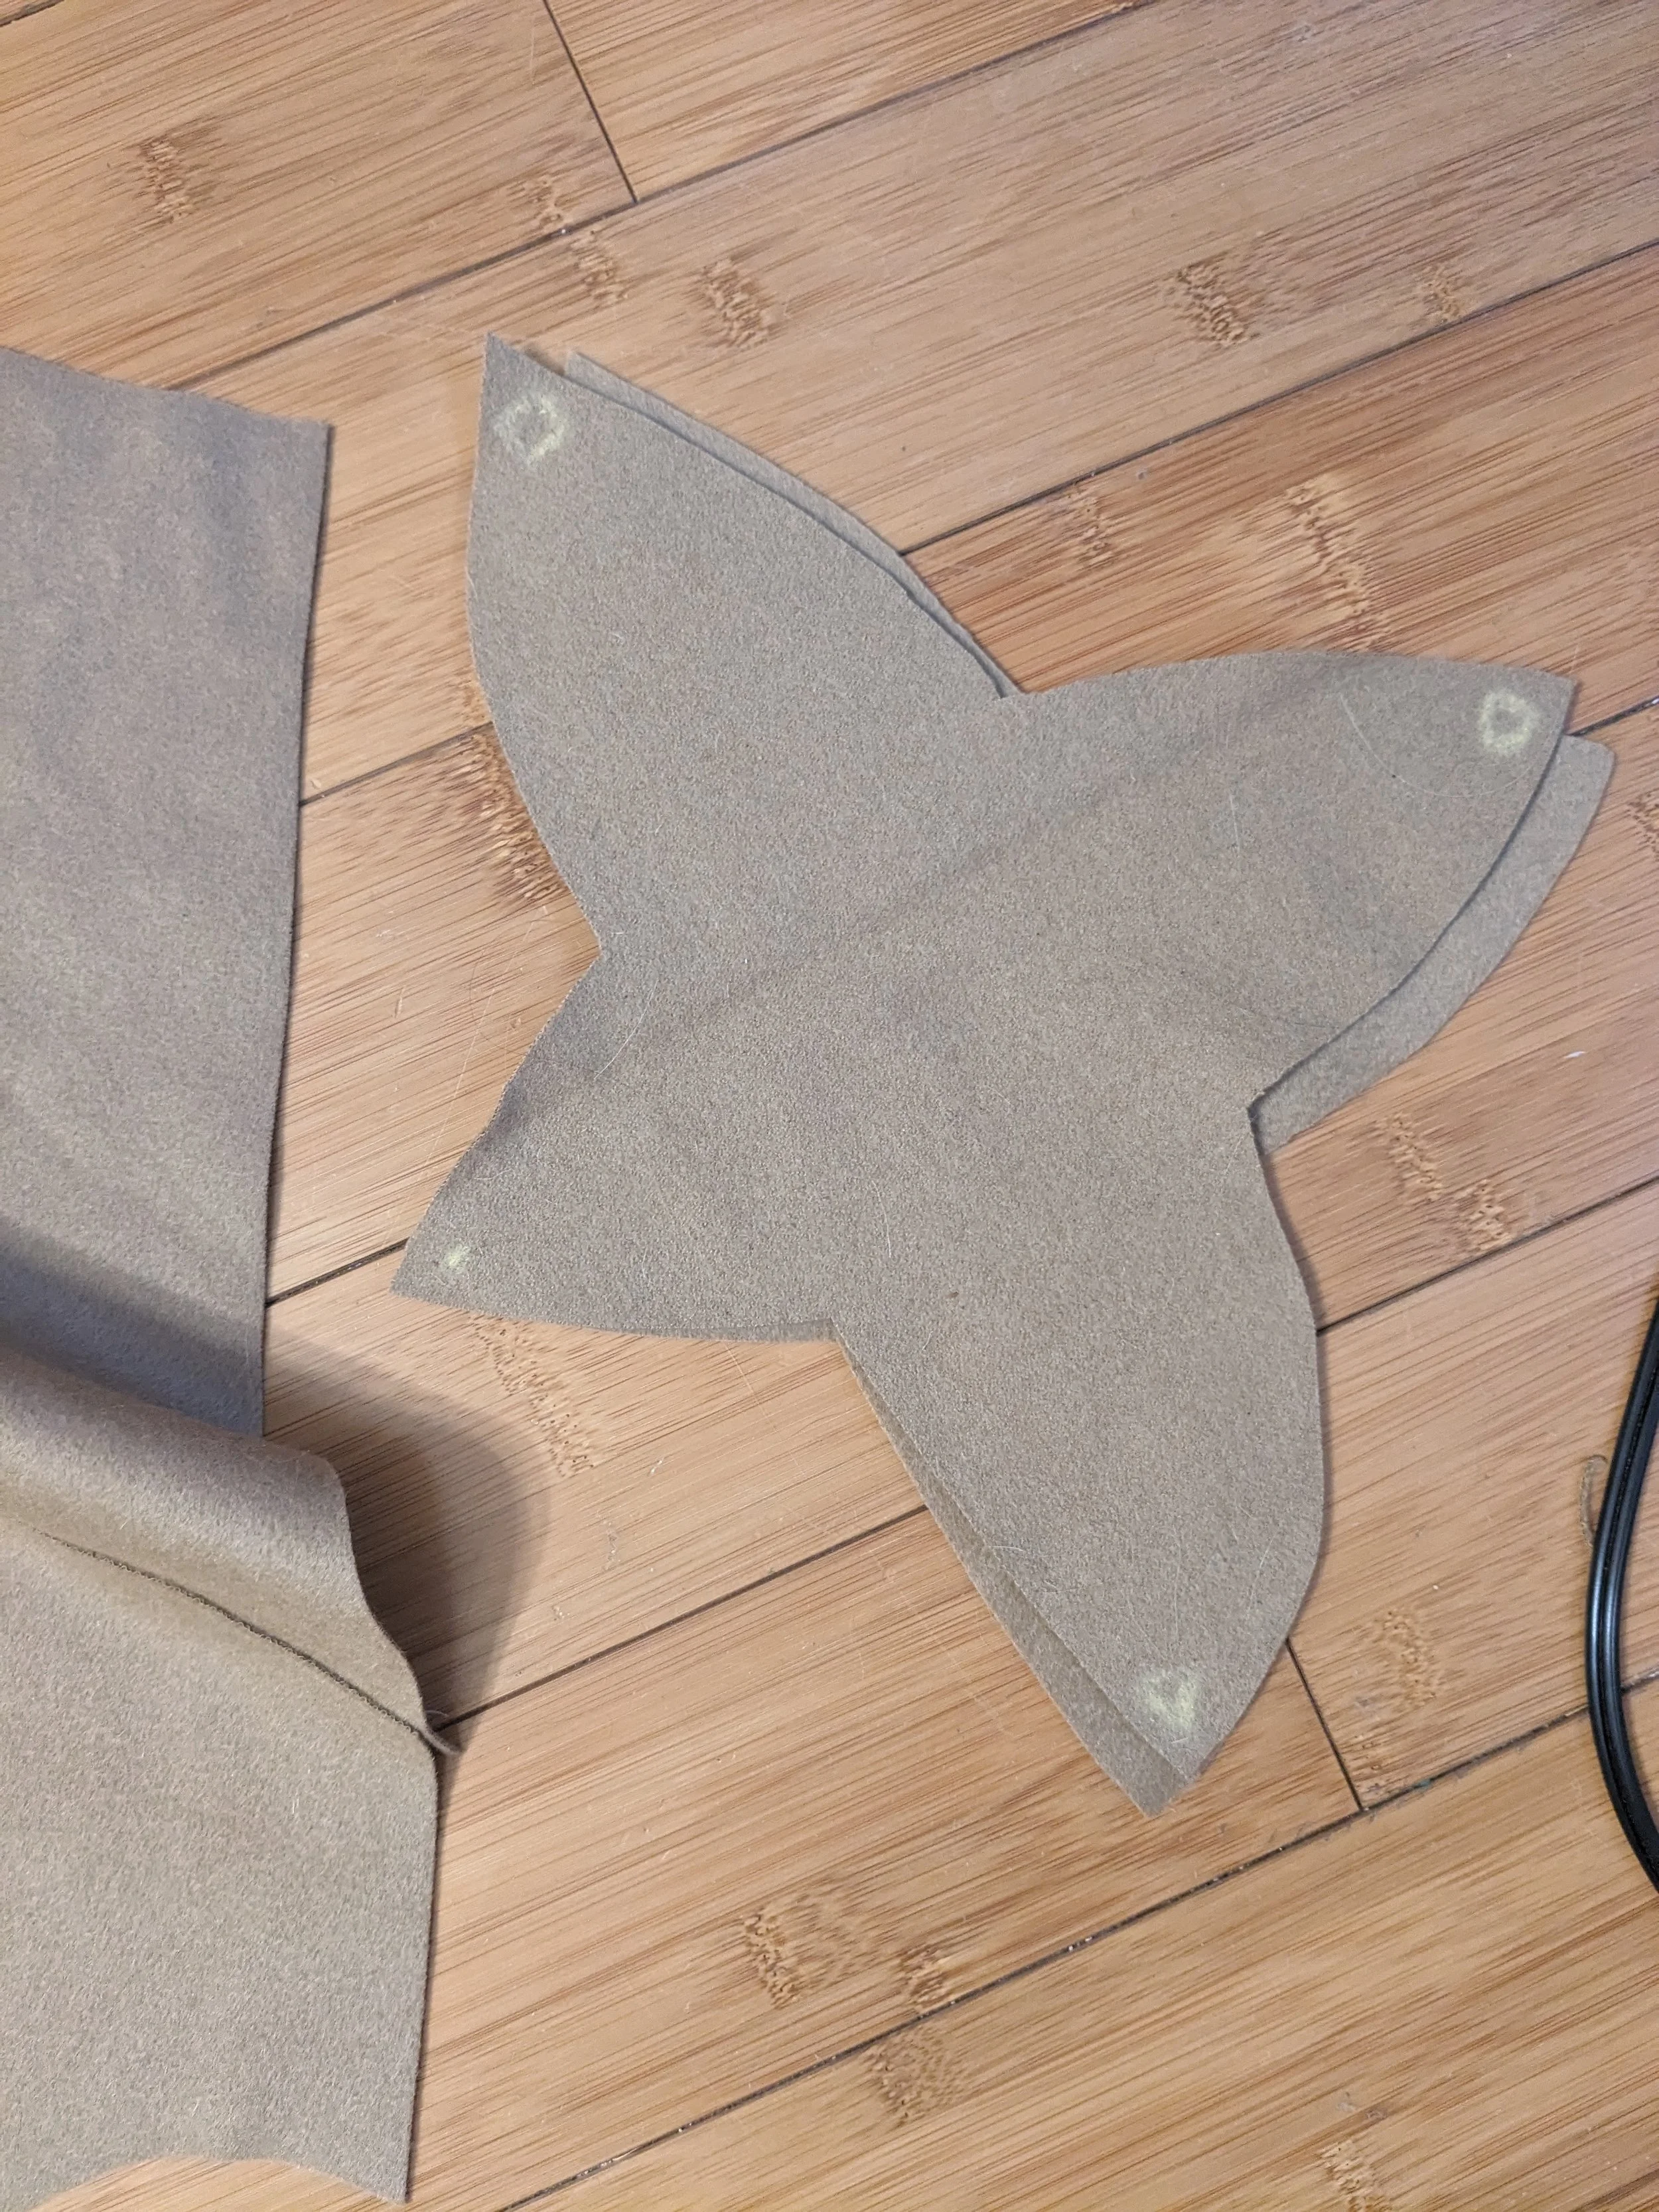
Anyway. I actually traced out all of this pattern instead of cutting the pieces - shocker - I was very diligent here. I traced a size “M” (more on that later) (I’m sure you can guess). The pieces are extremely cool. Bottom right image is what the sleeve looks like (minus some of the piecing together that makes it look more like a normal sleeve piece).


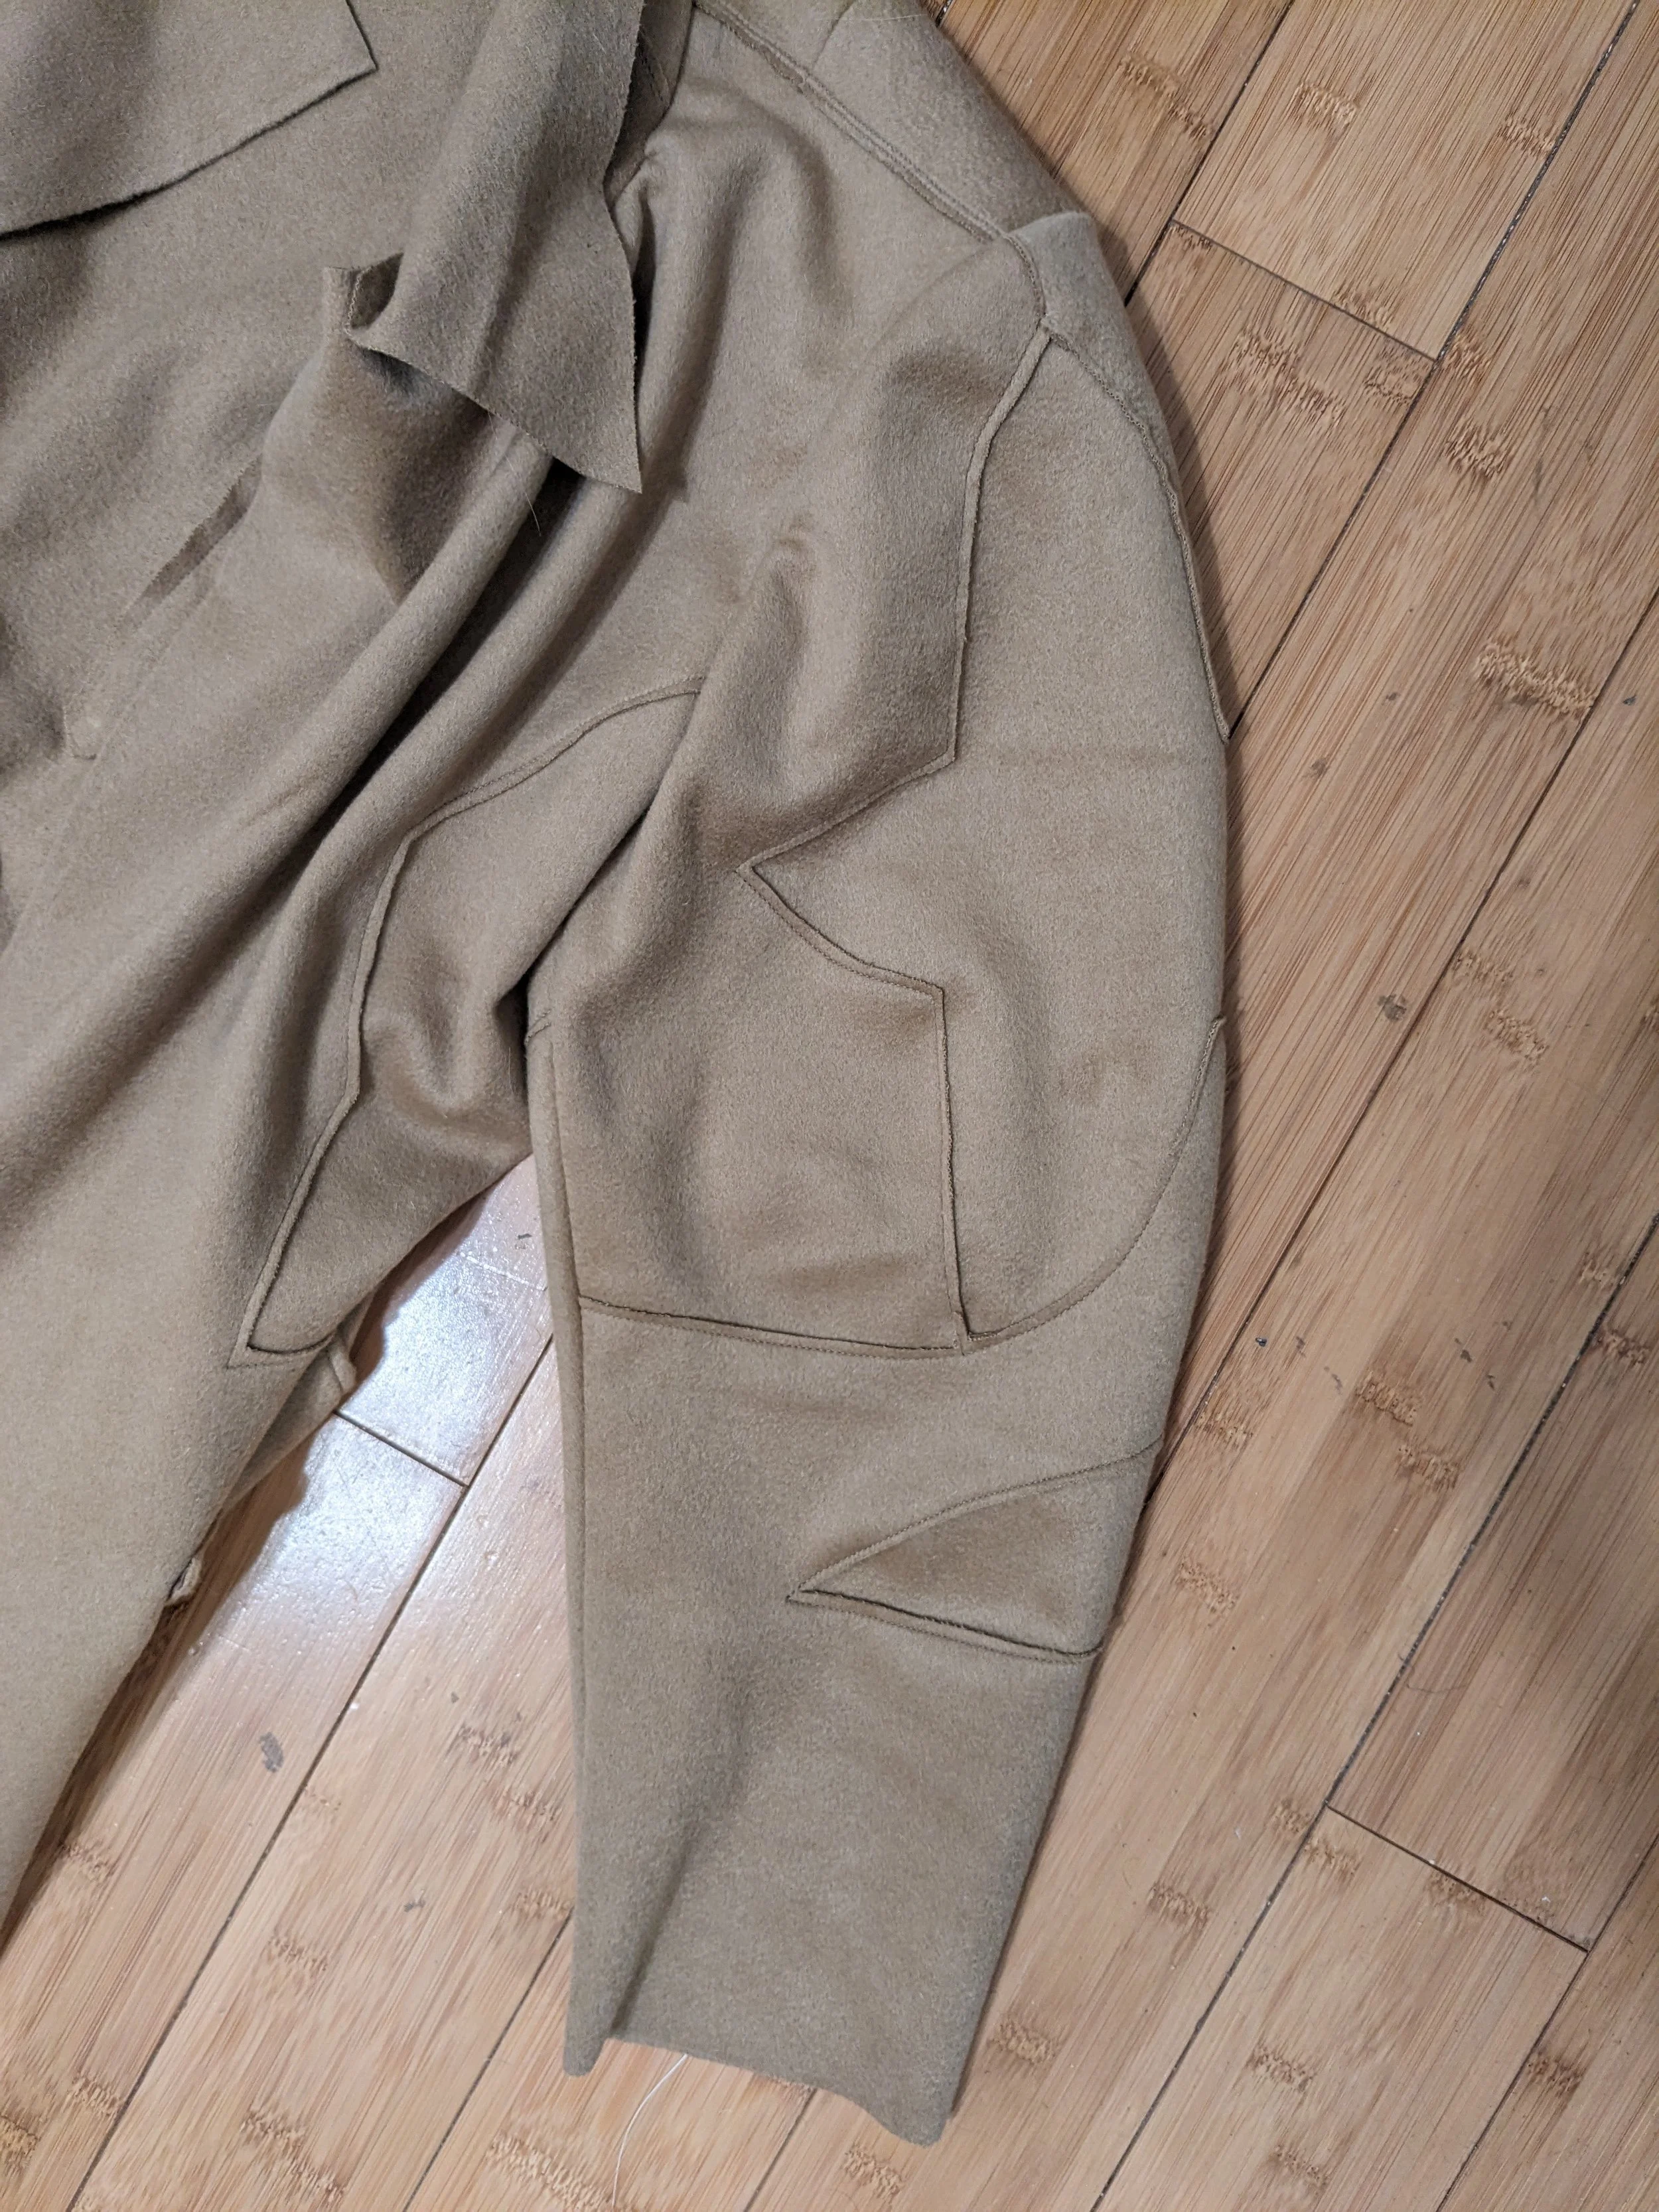
The only real change I made was to make the patch pocket lined - I don’t ever love how patch pockets look, I should probably have just left the edge raw like the rest of the pattern but it doesn’t really make a difference, I just wanted the inside of it to be smooth. Here they are sewn on - the pockets are cut perpendicular to the grain, I don’t know why and considered actually recutting at a 90 degree rotation before deciding it didn’t matter and I guess could add that texture that I wanted.


Then the rest of piecing the coat together is just layering the body piece wrong side over right side of smaller inset, repeat until all insets are layered in. I was very diligent about basting the piece on and then sewing. Since you’re somewhat sewing blindly over the layers (instead of having right sides together and knowing the seam allowance on both sides) this was helpful. I also found that I really don’t know what a 5/8” seam allowance over 2 layered pieces looks like - layering both pieces by 5/8” and then sewing over top with that allowance to the right side of the seam? That’s what I did. As another note I found that keeping that allowance or making it even smaller was the best way to create the bustle in the back insets. You want the 3D/forward projection which means having as much inset within the slashed seam as possible.


Here’s the slashes in the back, with darts also slashed. I also ended up marking 5/8” from the slash line to make sure that I didn’t have any wider of a seam allowance when I inserted the back inset pieces. I DID slightly “miss” sewing part of the bottom inset and the tricky thing with slashing is obviously, you can’t uncut it, you just have to sew closer to the slash line and hope the inset is positioned correctly and long enough. But it was fine, it’s not noticeable and somehow they matched on both sides.


Here’s the back with the inset, and after I trimmed down the seam, and then after I added in the side insets in the same way.


From there the fronts are sewn to the back at shoulders in the same lapped method (shoulders take 2 seam lines to reinforce) and along the sides. From THERE I tried on the jacket and realized - as I should have already had I read the pattern description - that this was way too big on me, very annoying. This in my opinion is not a jacket that needs a ton of ease. I mean, it’s a loose fitting jacket, but it should be fitted at the waist, and the drop of the drop shoulders is way too big per the body measurements on the envelope. Fool me twice, won’t get fooled again, etc but the extent of how much bigger this jacket was in a size medium (32-34 bust) than it should have been is far off the mark! So I was feeling dejected.. all my hard work tracing for nothing was my thought.


What’s a girl to do? I didn’t want to re cut the whole thing.. while I had more of my grandmother’s fabric, I was feeling sentimental and didn’t want to just redo it, “wasting” fabric on my own dumb mistake.. I would also like to say that this great review also mentions how super big it is on once it’s done. Read reviews when you can! That’s my suggestion to myself and to you.
I ended up cutting the shoulder and side seams, and then cutting each of those down by about a seam allowance, and also cutting down the back and front neckline to more closely match the curve of the size S of this pattern. I knew it wasn’t going to be perfect but the fabric I used takes heat shrinking so well that I knew I could set in the sleeves even if the size M sleeve and size S/M (“Patricia size”) armscye weren’t a perfect match..
And the sleeves are truly amazing, definitely my favorite part of the whole coat. STUNNING! And I love how the little star inset uses all 4 different markings (big circle, dot, square, triangle) so that you don’t mix up the orientation setting it in. So cute.


The sleeves are eased along top and set in as normal (I’m as surprised as you are) and I put in the collar and collar band also normal with right sides together. So the finishing is standard, and then the coat is done - no lining, no hemming on bottom or sleeves, no collar finishing. I would say I think that .. I think I would like if the collar were finished differently in some way. Faced maybe, I don’t know, it just feels sort of floppy and unfinished, it literally is left unfinished. That’s my one real complaint with the pattern aside from the sizing, it goes together really quickly and beautifully. Nothing in the instructions on trimming down any of the seams on the inside, that’s up to you I guess.

Last is buttons, which as the linked review above also points out, are better done so that the coat buttons asymmetrically or is double-breasted, since it’s a big coat. I asked my friend the genius sculptor Al Freeman what she thought I should do for the buttons and she suggested a covered button in the same fabric, which I did.


There it is!!! plus an inside view. I cut a thin strip of the fabric and used that to sew the buttons on, too. And I just did slashes for the buttonholes. I thought that matched the coat best but maybe I’ll come to regret that…
This is not a super hard coat to make. The lapping pieces go together easily and this project can be done quickly. It does turn out super nice and I’m very excited to wear this once it cools down a little in NYC.


And me in the coat… pretty right? what is this? Miyake does Dior New Look? I love the bustle, amazing that it’s just the insets that create that effect, no interfacing, nothing else.. it’s subtle, this fabric has a nice hand and is thick but an even stiffer/denser fabric would make the bustle more pronounced… love it
that’s all, till next time, love you!